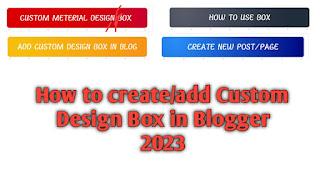
Good day lovers! welcome back to TechBrainaic your number one blogging solution portal. In today's comprehensive guide, we will discuss how to add custom design boxes in Blogger. Adding custom design boxes can greatly enhance the visual appeal of your blog and make it stand out from other blogs. We will cover step-by-step instructions on how to add custom design boxes to your Blogger blog, as well as the benefits of doing so. Whether you are a beginner or an experienced blogger, this guide will provide you with everything you need to know to get started.

A custom design box is a unique feature in Blogger that allows users to add additional design elements to their blog. It is essentially an HTML box that can be customized with CSS to create a variety of different styles and designs. Custom design boxes can be added to various areas of a blog, such as the header, sidebar, or footer, and can be used to display a range of different content, such as images, text, or social media icons. In this comprehensive guide, we will walk you through the process of adding custom design boxes to your Blogger blog.
Importance of adding custom design boxes in Blogger
Custom design boxes are an important feature of Blogger that can add both functionality and visual appeal to a blog. Here are some specific reasons why adding custom design boxes to a Blogger blog is important:
I. Enhancing blog design: Custom design boxes allow you to add unique design elements that match your brand or blog theme, making your website look more professional and visually appealing.
II. Improving user experience: By adding custom design boxes to your Blogger site, you can highlight important content or calls-to-action, making it easier for visitors to find what they are looking for and increasing the chances of them staying on your blog for longer.
III. Increased engagement: Custom design boxes can be used to encourage visitors to take specific actions, such as subscribing to your newsletter or following your social media pages. This can help increase engagement and interaction with your audience.
IV. Flexibility and control: Custom design boxes give you more control over the layout and design of your blog, allowing you to customize it to your specific needs and preferences.
V. Competitive advantage: Adding custom design boxes to your blog can help you stand out from your competitors and create a unique online presence that sets you apart.
VI. Improved SEO: Custom design boxes can be used to optimize your blog for search engines by highlighting important keywords or content, making it easier for search engines to crawl and index your website.
VII. Increased conversions: Custom design boxes can be used to create high-converting landing pages or product pages, increasing the chances of visitors converting into customers or clients.
VIII. Brand consistency: By adding custom design boxes to your blog, you can maintain a consistent brand identity across all pages and sections of your website, improving brand recognition and trust.
IX. Cost-effective: Custom design boxes can be created and added to your blog at a relatively low cost, making it an affordable way to enhance your blog's design and functionality.
X. Scalability: Custom design boxes can be easily replicated and used across multiple pages or sections of your blog, making it a scalable solution for enhancing your blog's design and functionality
To implement the material boxes design, you need to insert two codes. However, you are only required to include the material design box code if you are using one of the specified JagoDesain Blogger Themes, which include Plus UI, Medium UI, Fletro Pro, Imagz, and Lantro.
Important: It is advisable to create a backup of your current theme before proceeding to add codes in XML. This will serve as a safety net in case any issues arise, and you can always restore your previous theme.
How to Install Custom Material Design Boxes on Blogger in 2023
Step 1: Log in to your Blogger Dashboard.
Step 2: Click on "Theme" in the Blogger Dashboard.
Step 3: Click on the arrow down icon next to the "customize" button.
Step 4: Click on "Edit HTML" and you will be taken to the editing page.
Step 5: Locate the code "]]></b:skin>" or "/]]>/</style>" and paste the CSS codes provided below it.
/* Custom Material Design Box  by TechBrainaic*/

.techbox{background:#fff;position:relative;margin:40px 2px;padding:40px 15px 15px;border:1px solid rgba(230,230,230,1);border-radius:5px;box-shadow:0 10px 20px 0 rgba(30,30,30,.07)}

.techbox h2 {background:#02d07a;border-radius:3px;padding:8px 20px!important;position:absolute;margin:0!important;font-size:17px!important;color:#fff;top:-20px;font-weight:bold;left:30px;text-transform:uppercase}

/* Custom Material Design Box by TechBrainaic*/

.techbox.box-yellow h2{background:#e2c601}

.techbox.box-blue h2{background:#2ad2c9}

.techbox.box-red h2{background:#f7176a}

.clicker {width:60px;height:60px;margin-left:-30px;margin-top:-30px;background:#204ecf;border-radius:100%;position:absolute;transform:scale(0);opacity:.3;-ms-filter:none;filter:none;z-index:9999;pointer-events:none}

.drK .techbox{background:#130f40}.clicker{background:#fff}.clicker.is-active{opacity:0;-ms-filter:'progid:DXImageTransform.Microsoft.Alpha(Opacity=0)';filter:alpha(opacity=0);transition:opacity 900ms ease,transform 900ms ease;transform:scale(1)}
For use in dark mode, replace the marked section class .drk with your theme dark mode class
Step 6:
Next, you can add the material design box to your blog by copying the code provided below and pasting it after the CSS code above.
/* table detail */

.Blog table.tr-caption-container{min-width:inherit;width:auto;margin:0 auto;border:0;position:relative}

.Blog table.tr-caption-container tr td{background-color:transparent;border:0;padding:0}

.Blog table.tr-caption-container tr:nth-child(2n+1) td, .Blog table.tr-caption-container tr:nth-child(2n+1) td:first-child{border:0;background:transparent}

.Blog table.tr-caption-container .tr-caption{display:block;font-size:12px;font-style:italic;color:#767676;background-color:transparent;border:0}

.Blog table{width:100%;margin:20px 0px;border:1px solid rgba(230,230,230,1);border-radius:7px;overflow:hidden;font-size:14px}

.Blog table th{background-color:transparent;padding:15px 20px;border:1px solid #ddd;border-left:0;font-family:Noto Sans;font-size:13px}

.Blog table th:last-child, .Blog table tr td:last-child, .Blog table tr:nth-child(2n) td:last-child{border-right:0} .Blog table td{padding:15px 20px;border:1px solid #ddd;border-left:0;border-top:0;vertical-align:middle} .Blog table tr:nth-child(2n + 1) td{background-color:rgba(0,0,0,.025)} .Blog .table{display:block;overflow-y:hidden;overflow-x:auto;border-radius:3px;scroll-behavior:smooth;}
if you're using any of the specified JagoDesain Blogger Themes, which include Plus UI, Medium UI, Fletro Pro, Imagz, Lantro. Then don't copy the /*Table detail*/ because it's already there.
How to Enable Custom Material Design Boxes on Blogger.
Below are the codes for creating a custom material design box that can be utilized within a post.
Related Posts
FEATURES
- Your_Text_Here
- Your_Text_Here
✓• The code for the box shown above. 👇👇
<div class="techbox">

 <h2>FEATURES</h2>

 <ul>

<li>Your_Text_Here</li>

<li>Your_Text_Here</li> </ul> </div>
Blue Box
Your_Description
✓• The code for the box shown above.
👇👇
<div class="techbox box-blue">

<h2>Blue Box</h2>

<p>Your_Description</p></div>
✓• The code for the box shown above.
👇👇
<div class="techbox box-red">

    <h2>Red Box</h2>

    <p>Your_Description</p></div>
Yellow Box
Your_Description
✓• The code for the box shown above.
👇👇
<div class="techbox box-yellow">

<h2>Yellow Box</h2>

<p>Your_Description</p></div>
TechBrainaic Blog
| Name | TechBrainaic Blog |
| License | Premium |
| Version | 2.5 |
| Price | #300.000 |
✓• The code for the box shown above.
👇👇
<div class="techbox">

<h2>Techbrainaic blog</h2>

<table cellpadding="0" cellspacing="0" style="text-align: left;">

<tbody>

<tr><td><b>Name</b></td> <td>TechBrainaic Blog</td></tr>

<tr><td><b>License</b></td> <td> Premium </td></tr>

<tr><td><b>Version</b></td> <td>2.5</td></tr>

<tr><td><b>Price</b></td> <td> #300.000</td></tr>

</tbody>

</table>

</div>
Remember to save your theme changes after adding each custom design box. Test the functionality and appearance of your blog to ensure everything is working as intended.
Adding custom design boxes to your Blogger blog can transform its look and feel, improve user experience, and help you showcase important content effectively. Get started today and enjoy the benefits of a visually appealing and personalized website. Final thoughts and additional resources.
In conclusion, adding custom design boxes in Blogger can greatly enhance the visual appeal, user experience, branding, and content organization on your website. It allows for greater personalization, helps highlight important information, and contributes to a more professional and engaging online presence.
Warning!All Our Posts Are Protected by DMCA. Therefore Copying Or Republishing Of The Contents Of This Blog Without Our Permission Is Highly Prohibited!
If Discovered, Immediate Legal Action Will Be Taken Against Violator.
That's All
Thanks for reading our blog
Have a great day ahead!😍
© TechBrainaic
All right reserved


