Welcome to TechBrainaic: number one tech solution portal , In this blog post we will introduce you to the Igniplex v3 Premium Blogger Template. If you're a blogger in search of a stylish and feature-rich template, you've come to the right place. Igniplex v3 is a highly versatile template that offers a range of customization options to make your blog truly unique. In this article, we will provide you with a brief overview of Igniplex v3, highlighting its key features, functionalities, and benefits. Whether you're a beginner or an experienced blogger, Igniplex v3 will cater to your needs and help you create a visually appealing and engaging blog. Stay tuned as we explore the various aspects of Igniplex v3, from its modern design to its user-friendly interface. By the end of this article, you'll have a clear understanding of how Igniplex v3 can enhance your blogging experience and where to download it for free. Let's dive into the world of Igniplex v3 and discover ho...
Glassagram Review: Everything You Need to Know
Published by
Peter Ogunleye
On
Do you have a burning desire to secretly monitor someone's Instagram activity? Are you curious about what your friends or favorite influencers are up to on Instagram? Then, Glassagram might be the perfect solution for you. With Glassagram, you can anonymously monitor someone's Instagram profile, download their posts and stories, and keep tabs on their activity without alerting them. In this article, we'll delve deep into the features and benefits of Glassagram and help you decide whether it's the right Instagram viewer tool for you. What is Glassagram? Glassagram is a web-based platform that allows you to monitor Instagram profiles and download posts and stories without logging into the Instagram app. It is an Instagram spyware that captures screenshots of all Instagram activities on the target phone and syncs them to your account. The app only takes a few seconds to sync the screenshots, and you can view the target person's Instagram activities anonymously. Glassa...
How to Fix Queued Email in Gmail: A Comprehensive Guide
Published by
Peter Ogunleye
On
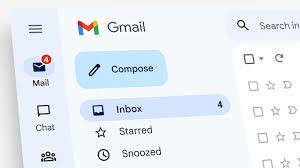
Gmail is undoubtedly one of the most popular email services in the world. However, like any other platform, it's not without its occasional issues. One frustrating problem that Gmail users often encounter is the " queued email " error. This error prevents emails from being sent immediately and can cause significant delays in communication. Just as we discussed in one of our previous article How to Recover a Permanently Deleted Gmail Account . In today comprehensive guide, we will explore the meaning of queued emails in Gmail, the possible reasons behind them, and provide effective solutions to resolve this issue. Understanding Queued Emails in Gmail When an email is queued in Gmail, it means that the message is stuck in a waiting state and cannot be sent immediately. Instead, Gmail will attempt to send the email at a later time. This can be frustrating, especially when you have urgent messages that need to be delivered promptly. Queued emails can occur due to various r...


