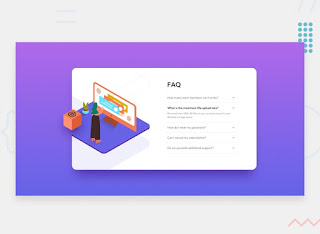
In today's digital world, bloggers are constantly looking for innovative ways to enhance the user experience on their websites. One effective technique is the implementation of a modern toggle content or accordion section. This feature allows bloggers to display large amounts of information in a compact and organized manner.
In this comprehensive guide, we will walk you through the process of creating a modern toggle content or accordion section on Blogger, a popular blogging platform. By following these steps, you can enhance the visual appeal and user-friendliness of your blog, while effectively organizing your content. What is a Modern Toggle Content or Accordion Section?
A modern toggle content or accordion section is a dynamic widget that enables website visitors to expand or collapse panels containing additional content. This feature is particularly useful when dealing with lengthy articles, FAQs, tutorials, or guides. By utilizing a toggle content or accordion section, bloggers can improve the readability of their content, reduce clutter, and enhance the overall user experience.
Benefits of Adding a Modern Toggle Content or Accordion Section on Blogger
There are several benefits to incorporating a modern toggle content or accordion section on your Blogger blog:
- Improved Organization: By condensing lengthy content into collapsible sections, you can create a more organized and visually appealing blog layout.
- Enhanced User Experience: The toggle functionality allows readers to easily navigate through your content, expanding only the sections they are interested in. This reduces scrolling and enhances user engagement.
- Reduced Clutter: Instead of overwhelming your readers with a wall of text, an accordion section allows you to present information in a concise and structured manner, reducing clutter and improving readability.
- Increased SEO Potential: Accordion sections can help improve your blog's search engine optimization (SEO). By organizing information into expandable sections, you can target specific keywords, improve keyword density, and make your content more relevant to search engine algorithms.
- Faster Page Load Times: By initially hiding the content within the accordion section, you can reduce the amount of data that needs to be loaded when a page is accessed, resulting in faster load times and a better user experience.
Important! Before we start adding codes in XML, I will recommend you to take a Backup of your current theme. By chance if any problem occurs, you can restore it later.
Step-by-Step Guide: Creating a Modern Toggle Content or Accordion Section on Blogger
Follow these steps to create a modern toggle content or accordion section on your Blogger blog:
You may want to read this post :
Step 1: Access the Blogger Dashboard
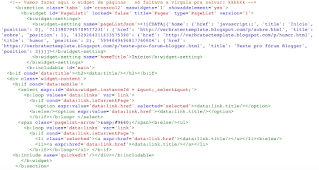
Step 2: Customize the Theme
- In the Blogger Dashboard, go to the "Theme" section.
- Click on "Customize" to access the theme customization options.
- Select "Edit HTML" to modify the HTML code of your blog's theme.
Step 3: Add Stylesheet
- Within the HTML code, search for the <head> tag.
- Insert the following stylesheet link between the <head> and </head> tags:
https://cdnjs.cloudflare.com/ajax/libs/font-awesome/6.4.0/css/all.min.css
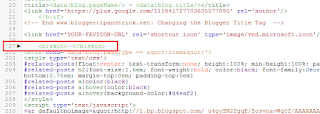
Step 4: Customize the CSS Code- Search for the ]]></b:skin> tag in the HTML code.
- Paste the following CSS code just before the ]]></b:skin> tag:
/* Accordion by TechBrainaic */

.acdn{position:relative;list-style:none;margin:30px 0;padding:0;font-size:14px;line-height:1.7em;font-family:inherit}

.acdn .ac{width:100%;padding:20px 0 20px 15px;margin:10px 0;background:#f0f0ff;border-radius:5px;}

.acdn .ac:nth-child(4n + 1){background:#f0f0ff;border:1px solid #8a8aff}

.acdn .ac:nth-child(4n + 2){background:#fff0f3;border:1px solid #ff8aa1}

.acdn .ac:nth-child(4n + 3){background:#f0faff;border:1px solid #8ad8ff}

.acdn .ac:nth-child(4n + 4){background:#fff7f0;border:1px solid #ffc08a}

.acdn .cont{margin:0;padding-left:27px;padding-right:27px;position:relative;overflow:hidden;max-height:0;transition:all .3s ease;color:#08102b}

.acdn .cont ul, .acdn .cont ol{padding-left:13px}

.acdn .cont li{padding:0}

.acdn .cont a{text-decoration:none;color:#08102b}

.acdn .cont a:hover{text-decoration:underline}

.acdn p:first-child{margin-top:0}

.acdn p:last-child{margin-bottom:0}

.acTtl{display:flex;align-items:center;font-weight:700;color:#08102b}

.acTtl span{display:flex;flex-grow:1}

.acTtl span:before{content:'';padding-left:15px}

.acIcn{flex-shrink:0;display:flex;align-items:center;width:12px;height:12px;position:relative}

.acIcn:before, .acIcn:after{content:'';display:block;width:100%;height:2px;border-radius:2px;background:#08102b}

.acIcn:after{position:absolute;transform:rotate(90deg)}

.acMn{display:none}

.acMn:checked ~ .acTtl .acIcn:after{visibility:hidden;opacity:0}.acMn:checked ~ .cont{max-height:100vh;padding-top:15px;padding-bottom:8px}

.drK .acdn .ac{background:#252526;border:1px solid #4c4c4e}

.drK .acdn .cont, .drK .acdn .cont a, .drK .acTtl, .drK .acMn:checked ~ .acTtl{color:#fefefe}

.drK .acTtl .acIcn:before, .drK .acTtl .acIcn:after, .drK .acMn:checked ~ .acTtl .acIcn:before, .drK .acMn:checked ~ .acTtl .acIcn:after{background:#fefefe}
- Save the html changes by clicking on the save icon
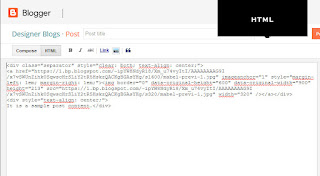
- Create a new blog post or open an existing one.
- Paste the following HTML code where you want to display the accordion section:
<!--[ Accordion by TechBrainaic ]-->

<div class='acdn'>

  <!--[ Accordion 1 ]-->

  <div class='ac'>

    <div class='acCont'>

      <input class='acMn' id='offaccor1' name='accordion-1' type='checkbox'/>

      <label class='acTtl' for='offaccor1'>

        <i class='acIcn'></i>


        <!--[ Accordion Title ]-->

        <span>Accordion_Title_1</span>

      </label>

      <!--[ Accordion Content ]-->

      <div class='cont'>

        <p>...</p>

      </div>

    </div>

  </div>


  <!--[ Accordion 2 ]-->

  <div class='ac'>

    <div class='acCont'>

      <input class='acMn' id='offaccor2' name='accordion-2' type='checkbox'/>

      <label class='acTtl' for='offaccor2'>

        <i class='acIcn'></i>


        <!--[ Accordion Title ]-->

        <span>Accordion_Title_2</span>

      </label>

      <!--[ Accordion Content ]-->

      <div class='cont'>

        <p>...</p>

      </div>

    </div>

  </div>


  <!--[ Accordion 3 ]-->

  <div class='ac'>

    <div class='acCont'>

      <input class='acMn' id='offaccor3' name='accordion-3' type='checkbox'/>

      <label class='acTtl' for='offaccor3'>

        <i class='acIcn'></i>


        <!--[ Accordion Title ]-->

        <span>Accordion_Title_3</span>

      </label>

      <!--[ Accordion Content ]-->

      <div class='cont'>

        <p>...</p>

      </div>

    </div>

  </div>


  <!--[ Accordion 4 ]-->

  <div class='ac'>

    <div class='acCont'>

      <input class='acMn' id='offaccor4' name='accordion-4' type='checkbox'/>

      <label class='acTtl' for='offaccor4'>

        <i class='acIcn'></i>


        <!--[ Accordion Title ]-->

        <span>Accordion_Title_4</span>

      </label>

      <!--[ Accordion Content ]-->

      <div class='cont'>

        <p>...</p>

      </div>

    </div>

  </div>

</div>
Step 6: Save and Publish the Post
- Review the changes and modifications you have made to the HTML code.
- Save and publish the blog post.
Congratulations! You have successfully added a modern toggle content or accordion section to your Blogger blog.
Conclusion
Incorporating a modern toggle content or accordion section on your Blogger blog can greatly enhance the organization and user experience of your website. By following the step-by-step guide provided in this article, you can easily create this dynamic widget and improve the readability and accessibility of your content.
Warning!All Our Posts Are Protected by DMCA. Therefore Copying Or Republishing Of The Contents Of This Blog Without Our Permission Is Highly Prohibited!
If Discovered, Immediate Legal Action Will Be Taken Against Violator.
That's All
Thanks for reading our blog
Have a great day ahead!😍
© TechBrainaic
All right reserved


